This is what my garage looked like the last couple years (+/- 1 bike). Though I worked at a bike shop, I was still too cheap to purchase any sort of standing rack. Over the years I’ve noodled around Google looking at homemade/cheap bike storage/organization solutions every now and then, but have never acted upon it. Something changed this past Sunday, and I went out to Lowe’s to pick up all the supplies and tools I needed! This is actually the first time I’ve ever built something with PVC pipe. Also, I’ve pretty much seen every PVC bike rack out there on the internet by now.
- Supplies bought for a 4 bike rack:
- 40 ft of 3/4″ PVC pipe
- 26 Tee connectors
- 6 Elbow 90˚ connectors
- PVC ratcheting pipe cutter (easier and cleaner than hacksaw)
- Rubber mallet
- PVC cement (didn’t use, going to return)
I had to buy the PVC sold in 5 ft pipes because I couldn’t fit 10 ft pipes in my car. They were essentially the same price…so that doubled the price of piping for me. In a perfect world where I wasn’t testing lengths and making adjustments, I would’ve needed exactly 30 ft 4 inches of PVC. Also, I plan on returning the cement because this rack will just be in my garage, and it allows me to alter it whenever I want in the future.
I used 3 lengths of PVC:
- A: 11″ x 25 pcs
- B: 8″ x 8 pcs
- C: 1.5″ x 4 pcs
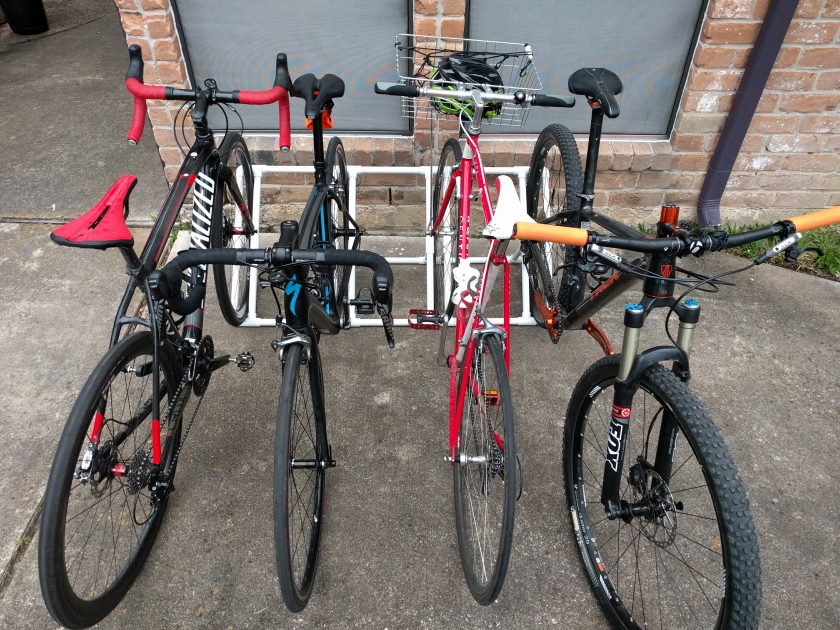
Note: This is for three 700c road/CX bikes and one 29″ mountain bike.
“C” pieces were 1.5″ to allow the connectors to be flush. It still allows CX tires to fit. I used 2.5″ on the furthest one to accomodate the width of my 2.3″ MTB tires.
I played around with some different lengths of the top “A” pieces and “B”. My initial build was met with rear derailleur pulley contact on a couple bikes. With this build they no longer hit the derailleur.
Distance from center-to-center of each tire section is exactly 15 inches. This allows plenty of space between each alternating bike. Those could probably be shortened if space is tight.
Without further ado…here’s the rack in action: